Managing Registers
- Kevin Colaco
Terminating a Register
Terminating a Register on the CAS
Overview
This feature is used to remove a register from use and free up the POS and license for deployment to another store.
Warning
Be sure that you are terminating the right register. This cannot be reversed!
Details
The user selects the venue, store, register and POS unit details from the dropdown menu. After each selection the screen will refresh to only display the options based on the store and register hierarchy.
Registers can be terminated directly from the POS or from the CAS.
Access
Access to this function at an enterprise level is limited by default to the System Administrator and Financial users only. Store managers and zone managers may have terminate register at Venues or Store assigned to them.
Terminating a Register on the POS
Overview:
This process terminates the POS unit from the venue. This is done when the store is being closed for the season and the registers are being returned. Live support option in bottom right corner of screen.
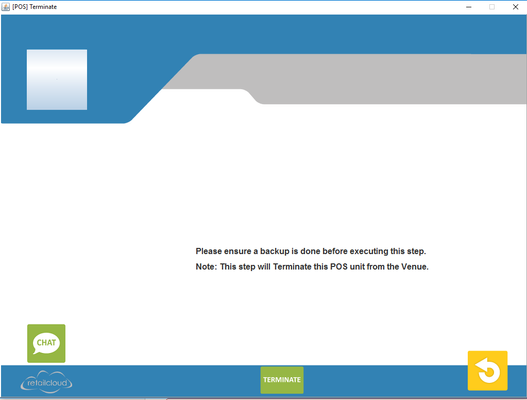
Details:
This process will clean up the database, logs, and backup data files and exit from the application.
Warning
This will erase all data from the POS and terminate it from the CAS.
Access Rights:
Register Back up Settings
Settings on CAS
Overview User clicks backup and the entire database backup is taken. This is based on the backup settings in the configuration menu. Location: The user has the option of automatically creating a backup to a remote or local site by selecting the required option (local, Ftp, Sftp or DropBox) Details Field information when using FTP or Sftp Folder path: The desired location path has to be entered. For local, a directory must be setup. IP: The IP address of the remote machine. Username: Username of remote machine. Password: Password of remote machine. Frequency: User selects how often the backup will take place. BackUp Type: with selective checked it will only backup transaction data and other selective data Field information when using Dropdox. Frequency: User selects how often the backup will take place. BackUp Type: with selective checked it will only backup transaction data and other selective data Access Access to this function at an enterprise level is limited by default to the System Administrator and Financial users only.
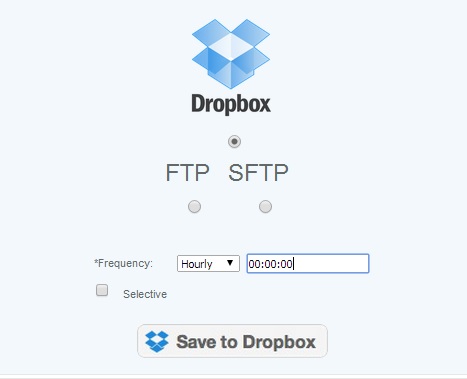
Settings at the POS
Overview Configuration POS Settings Backup - This sets your CAS and POS backup destination If you want to save the POS backup locally on the POS, then from the POS set the backup to the local setting - otherwise these settings will be used (you should confirm on the POS that you do not have the setting overridden at the POS level) If you want a CAS backup other than your scheduled time, you can create a backup immediately from Utilities>Backup Difference in Selective and Full Backups: The selective setting will backup the primary transactions, whereas the full backup will backup additional tables which may have modifications. This link will display all of the tables backed up by each setting so you can determine which level of backup you are comfortable with. Note that the full back up will of course create a much larger file and required more resources to store. Point to Consider There will be space requirements that have to be considered depending on the frequency of the backups. You can also obtain backups from the Central Server, your at risk data is data that is on your local POS that has not been pushed to the server. Details Dropbox If the backup is on a Dropbox server site then the user chooses the frequency, press save to Dropbox. This will then take them to a page where they will have to enter there username and password for there Dropbox account. Once that is save whenever you set your backup frequency thats when the system will create backups for your information. FTP/SFTP If the backup is on a FTP/SFTP Site then the user must specify the IP address of the system. The user must enter the username and password, which are the same as the ones used for logging in to the CAS server, and select the frequency (how often the backup will occur). You can use your own ftp site (many are available at no cost). Locally (POS) If the backup is saved locally (on the POS itself) then the location to save the file is to be specified in the Path field. The path to save the file on the server is unique to each merchant. Access Access to this function is limited by default to the System Administrator and Financial Users only.
Backup settings will include information required while keeping a backup of the data by the POS unit. The backup can be saved locally or on a remote system, at either a Hourly, Daily, Weekly or Monthly frequency. There will be space requirements that have to be considered depending on the frequency of the backups.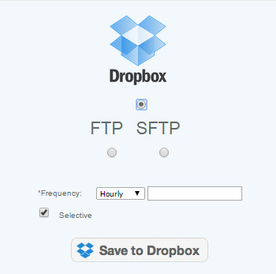
Generating a backup on the POS
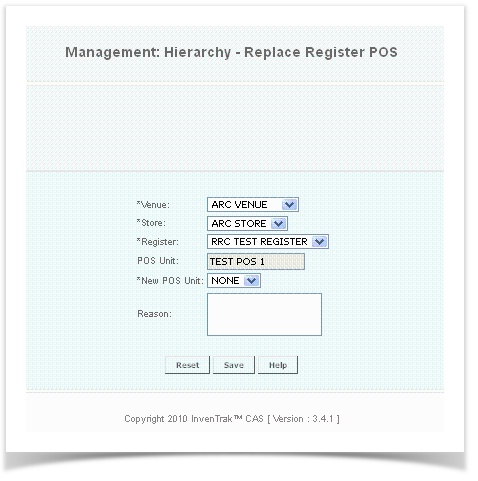
Replacing a Register
Overview This feature allows the user to physically replace one register with another while keeping the register number intact. The user will then be able to reinstall the machine downloading all transactional data from the original register to the new one. This is only necessary if the enterprise is tracking serial numbers. Details Select the Venue from the drop down menu that the register is placed in. Select a Store from the drop down menu that the store is placed in. Select the Register name that The POS Unit will automatically be populated. Select the New POS Unit from the dropdown Reason is a text box for the reason for the replacement Access Access to this function at an enterprise level is limited by default to the System Administrator and Financial users only. Store managers and zone managers may modify settings at Venues or Store assigned to them.