Creating a Store
- Former user (Deleted)
- Eric Guzman (Unlicensed)
- Former user (Deleted)
Overview
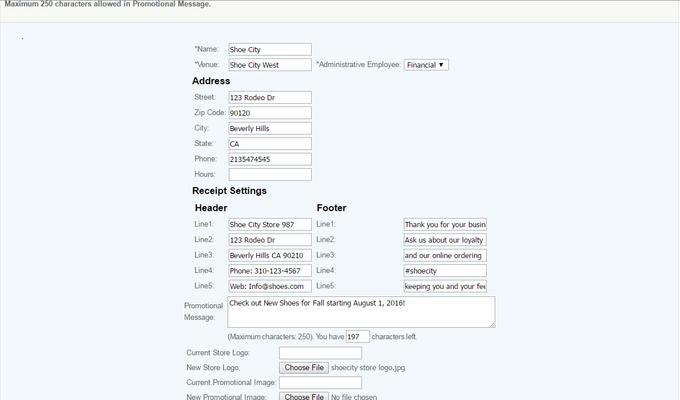
This section allows a user to create a store, assign it to a venue and a store manager as well as to configure many of the settings for the store.
- To navigate through CAS web portal to customize receipt header, footer and promotional message use the path: Management/Hierarchy/Modify Hierarchy
- Use the drop down menu to select Store Type.
- Click on radio button for Store Name.
- Click the FIND button to open Management: Hierarchy - Store Page
- Fill in appropriate information for Receipt Settings fields for header, footer and promotional message.
Detail
Each store must have its own unique Name. This will show up in all reports and filters so you should name them carefully. If you try to create a store with an existing name a popup will displayed asking you to confirm this activity.
Each store must be assigned to a Venue, the store will be associated with the venue warehouse and will receive its default settings from the venue setup unless overridden at a store level.
Warning
Store names cannot be changed or moved to a different venue once a store is created!
Each store must be assigned to an Administrative Employee who has a Store Manager role. If you have not already created an employee with this role you must do so first. The Store Manager that is assigned to this store may be modified at any time.
Address information contains conditionally mandatory fields. If no address information is entered then it can remain blank. Once any address information is entered, then all address fields must be completed (except store hours is never mandatory).
The printer will print up to five Header Lines, please limit each line to the character restrictions of your printer
The printer will print up to five Footer Lines, please limit each line to the character restrictions of your printer
A Promotional Message up to 250 characters can be added to display on the customer receipt.
If your printer supports it, the StoreLogo will be printed on the receipts, the logo should be in a jpeg. format and be no larger than 126 x 97 pixels. So you should keep your ratios between 4 to 3. If you would like to change or add a logo, use the "Choose File" option to navigate to the file and press Open . Store logos will appear on transaction receipts. If you wish to have the logo appear on the screens on the POS, the logo needs to be set under company details
If the user is assigning a specific Price Book to this venue select it from the drop down. price books can be modified or added later.
The Print on Save option is selected as a default value, and should always be selected if you have a printer attached. If the Print on Save option is not selected then the POS will not send receipts to the printer.
The Allow Tax Exempt Sales option is selected as a default value, if you de-select it registers associated with the store will not be able to perform Tax exempt sales
The Go Green option is selected as a default value, this will automatically send a digital receipt to all transactions associated with customers regardless of their individual go green selection
Default Quantity - The default quantity set for making sales or refunds in the POS.
Rounding - The decimal rounding for the item totals in the POS
Coupon Level High Amount - The maximum coupon level allowed for the store
Coupon Level Low Amount - The minimum coupon level allowed for the store
Maximum Cash Payout - The maximum cash payout that can be made for the store.
Remote Printing Support - If you have Ethernet printer and want to support Remote Printing check the box
Store Printer IP - This is where you enter the IP of the Ethernet Printer (Kitchen Printer will only print if Printer IP added here)
Store Printer Share Name - will be the name that the printer on the network. Network printer names are a combination of the name of the server (computer) they're attached to and the "share" name of the printer (the name an administrator gave the printer when it was created and shared). The name looks like this: \\server-name\printer-name
Store Printer Port -
If Override Default Tax rate is checked after the user saves the entry, they will be navigated to a screen that allows them to modify the default tax rate. If there is no Tax Structure established, this should be modified later.This will override the settings at the tax structure level and the venue level, and will not be effected by any changes made at the tax structure management screen.
Should the user wish to override the Minimum Cash Draw amount and the Maximum Cash Draw amount for which email alerts will be generated, these boxes should be checked and the user will be navigated to a modification screen after they save the venue. This will override the settings at the alert and venue level, and will not be effected by any changes made at the Alert Management screen. Changes made at the register level however will override venue settings.
Access
Access to this function at an enterprise level is limited by default to the System Administrator and Financial users only. Zone managers may modify store settings at Venues or Store assigned to them.
When assigning a user to a store, their employee status must be set to 'Active' or they will not appear in the dropdown.