MailChimp Integration
- Eric Guzman (Unlicensed)
- Kristy Sherman
- marketing (Unlicensed)
Overview:
This is the set up to allow for your MailChimp account to be integrated with retailcloud and allowing you to easily send well designed promotional campaigns to your customers. Your existing database of customers is used and you can select to email a discount or coupon using one of the templates provided. It's quick and easy to effectively reach your customers and make them aware of a special offer you have.
Best Practice:
Track your promo campaign to see how much business it generated, as well as monitor your profit margin on the sales. This is best accomplished by using an unique discount code of the promotion so you will be able to follow the effect of the promo on your CAS reports.
Getting started:
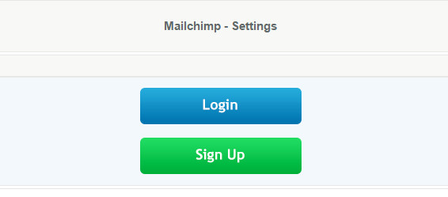
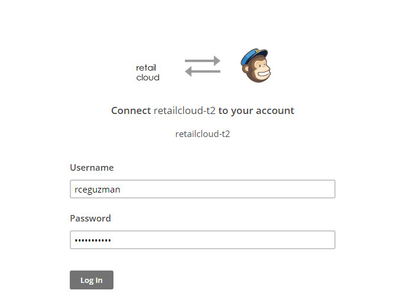
Go to realtimetotals.com / Configuration / Integrations / Mailchimp. If you have an Mailchimp account you can easy login by pressing the Login button and entering your Mailchimp username and password.
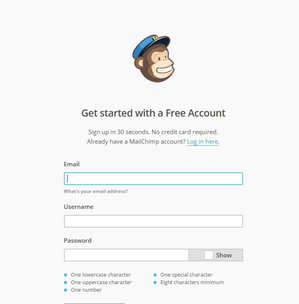
If you don't have a Mailchimp account there is no need to worry, select Sign Up and easily set up an account with Mailchimp to get started.
Mailchimp vocabulary:
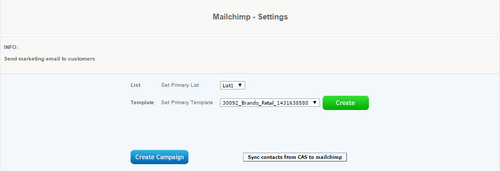
- List - where you can store multiple customer lists with their names and email addresses
- Template - create and save different templates to send now or later
- Campaign - an email design that is sent right away and is not saved to be used again
How to Send a Campaign:
Create unique Discount or Coupon
Go to realtimetotals.com / Configuration / Integrations / Mailchimp
Either log in with existing account or signup
- Create a customer list
- You can add emails manually at mailchimp.com or
- Sync contacts from CAS to Mailchimp by 1st creating a list at mailchimp.com
- When Syncing contacts, select list to sync to
- success message will appear at the top of the screen
- Create Template - you can edit this template in Mailchimp
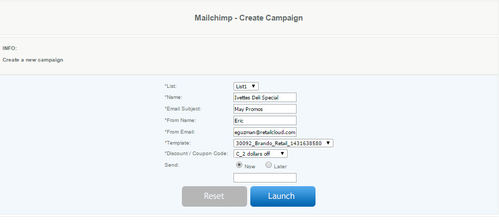
- Create Campaign
- Select which list you want to send this promo to
- Name your campaign (Customers will see this)
- Add a subject (Customers will see this)
- Enter From name (Who customers see the campaign is from)
- Enter From email (Email address for company sending the email)
- Select template to send (Will show up in drop down)
- Select your unique discount or coupon code (only active codes listed here)
- Select to either send now or later
- launch
- Your campaign will now appear under "Campaigns" in Mailchimp
- From Mailchimp, select campaign you just created, review it and select to schedule launch or send.
- You can now track your promo campaign in your CAS reports
- You can also track who opened your email in Mailchimp "Reports"
That's it!
Settings for Mailchimp:
Login for Mailchimp:
SignUp for Mailchimp:
Create Template:
Create Campaign: