Scripted Virtual LPT1 Configuration for USB Printers
Printing to USB printer in lieu of LPT1 printer (using virtual lpt1).
What you will need: local password protected administrator account, shared printer, .bat script for recreating virtual port, task scheduled to run .bat script on logon
Circumstances: If you have a USB Printer and need to configure it to work with the POS on LPT1.
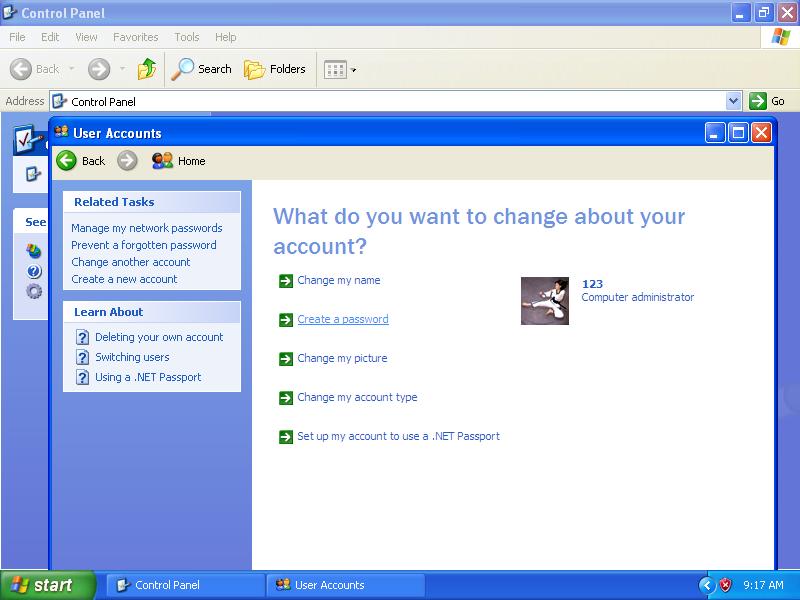
Enable a Password
Under Control Panel>Users, create password for POS admin account.
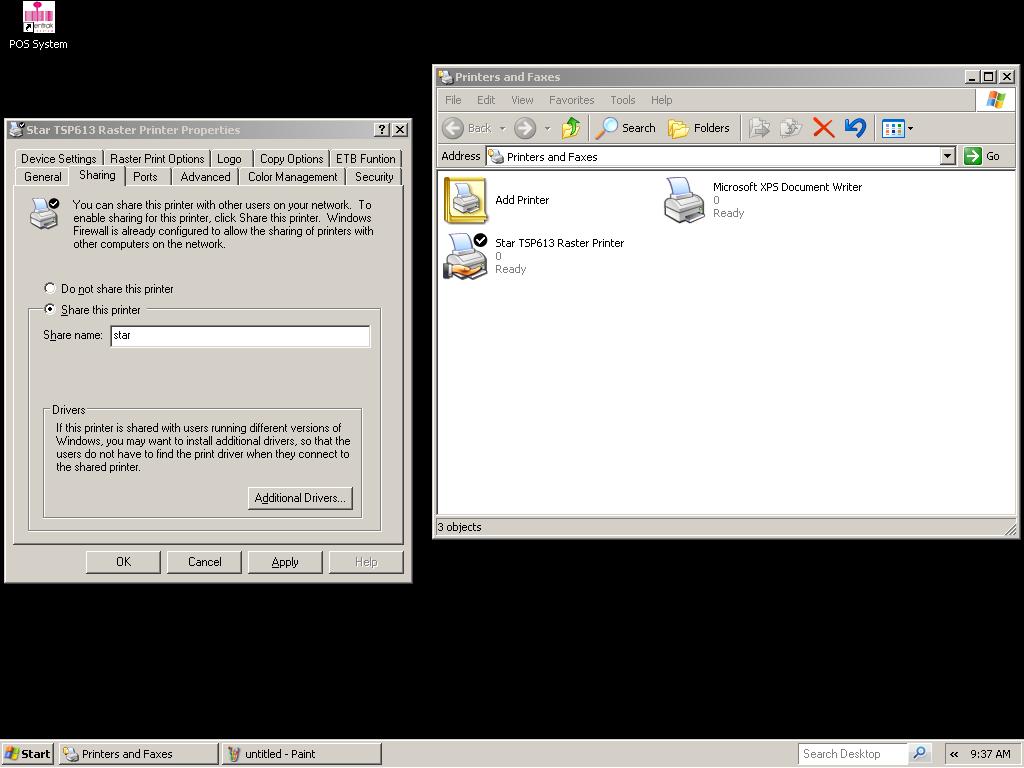
Share the Receipt Printer
Click Start>Printers and Faxes
Right click the receipt printer and select printer properties
Click the sharing tab, input a short name for the printer, I.E. "star", select Apply and OK.
Create the Script
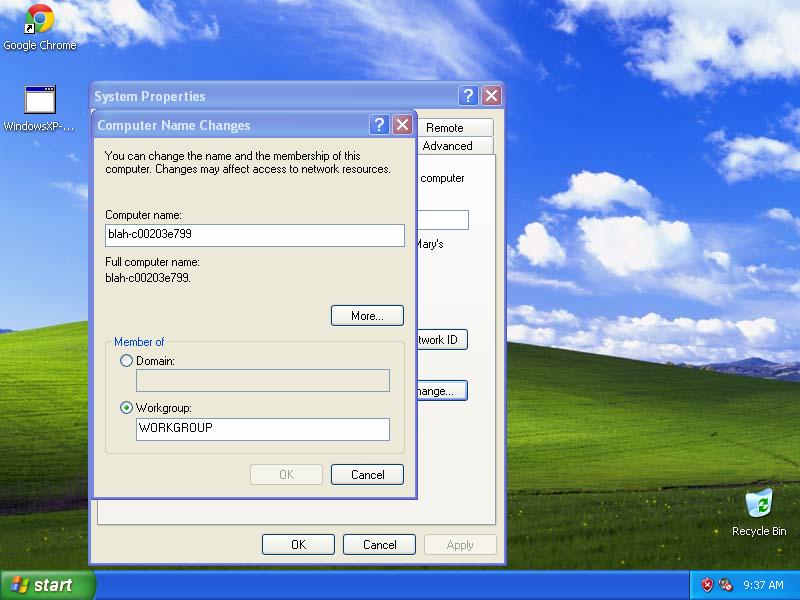
Click Start and right click My Computer and select Properties
Select the tab called Computer Name
Click Change
Copy the Computer name listed here.
Click cancel to close.
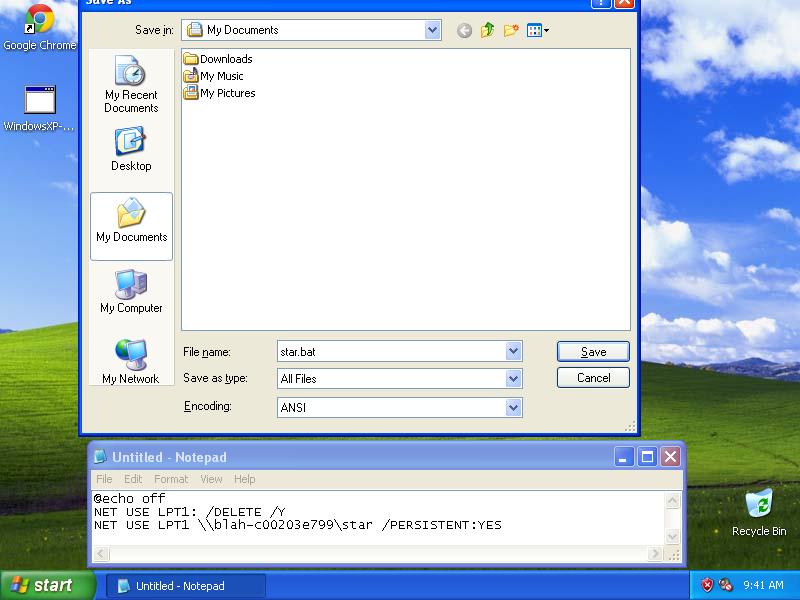
Open notepad and paste the following into a blank document and then replace COMPUTERNAME with the actual computer name you just copied by pasting it. Also delete PRINTERSHARENAME and replace it with the short name you chose for the printer. Go to File>Save As, choose "Save as type:" All files and name this document star.bat and save it under My Documents. Close the document.
@echo off
NET USE LPT1: /DELETE /Y
NET USE LPT1 \\COMPUTERNAME\PRINTERSHARENAME /PERSISTENT:YES
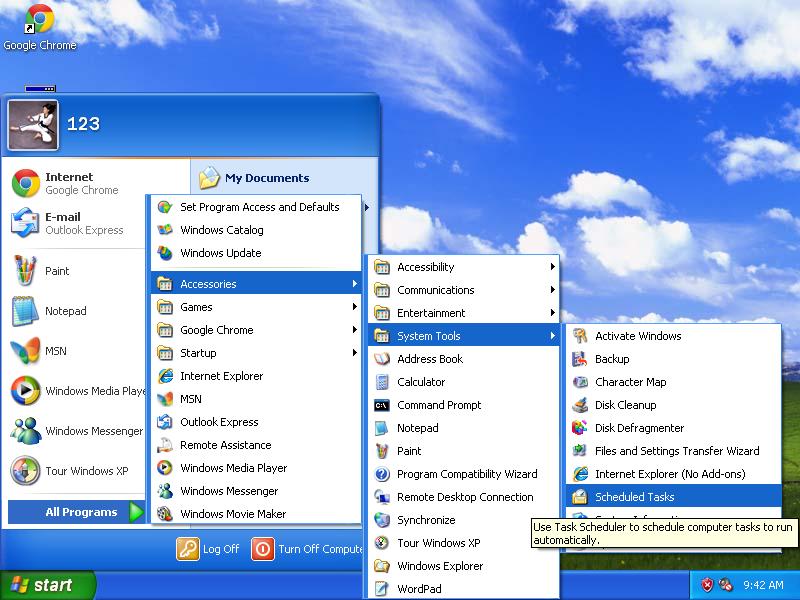
Add file to Windows Scheduler to run on Startup
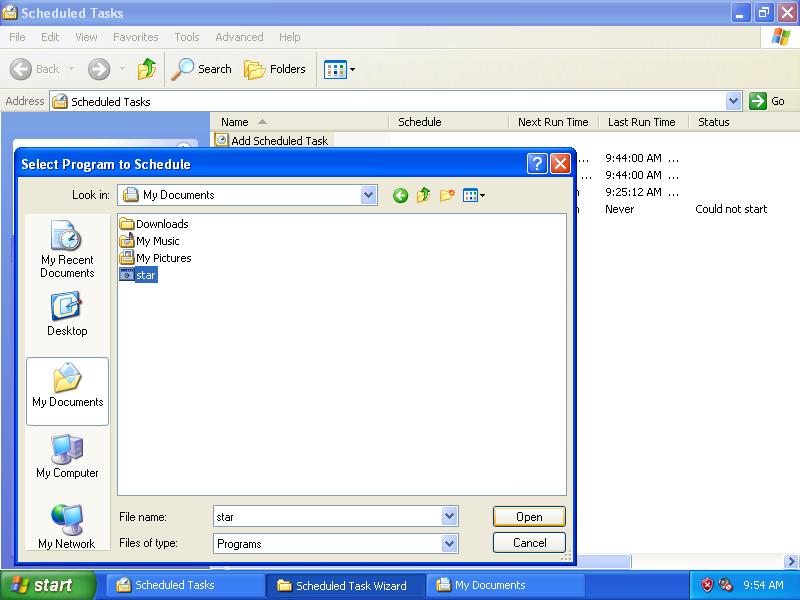
Open Windows Scheduler under Start>All Programs>Accessories>System Tools>Scheduled Tasks and add the star.bat script to the scheduler (should be saved in My Documents), have the task run "When I log on", enter the system password when prompted and click finish.
Restart computer and logon, during logon, you should see a black box pop up and immediately disappear. Confirm the script was successful by clicking Start>run and typing cmd and in the black box type "net use", without quotes. Lpt1 should be listed here.
Set your Printer to LPT1 under your Hardware Settings on the POS. You can now print to your USB printer as if it were LPT1. Test by logging in to the pos and printing a report.