CAS - Merchandise Receiving
Overview
You have created your items and now need to make this your inventory (you need to add quantity to the items). This can be done a number of ways, including through the receiving function. Receiving is done by vendor - you cannot receive items from multiple vendors in the same receiving.
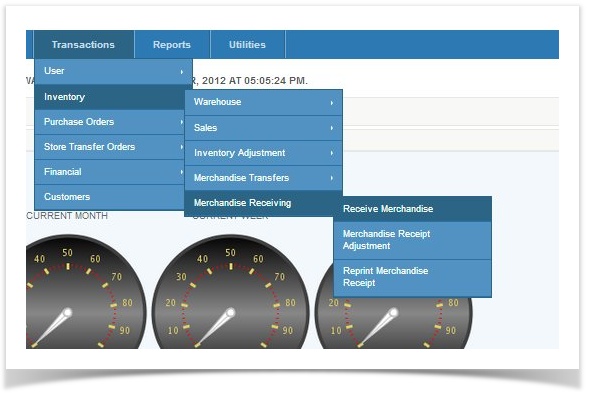
Merchandise receiving provides merchants the ability to create inventory quantity. This could be a continuation of inventory for items already found in the system or new opening balances. This is the process that tells the CAS that items entered are found in inventory for a specific location. Without receiving the items, a store would not have them available to sell and will not be found in the local tables for the POS or quantity for inventory tracking. With a receiving, items and quantity are found in the locations that has been selected from the drop downs found in the UI (user interface). Merchants can use the Merchandise Receiving for a number of reasons, the majority of users will use it for recording quantity of items received, it also has functionality to receive merchandise directly from a Purchase Order. So for merchants weekly, monthly, or individual vendors orders can be received and associated to a store or warehouse in a timely fashion.
Creating a Merchandise Receiving
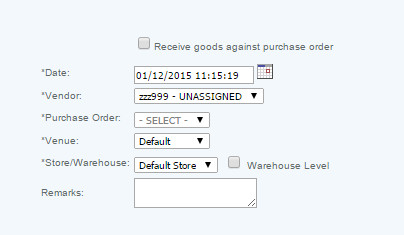
Receiving merchandise is created by selecting which location (which store or warehouse) the inventory is going and which vendor (distributor) that merchandise came from. All created locations and vendors will be listed in the drop down boxes. If the store you are looking for isn't present, by default warehouse is selected. By un-checking warehouse the store options will be available in the drop downs. Enter Remarks as needed (not a required field).
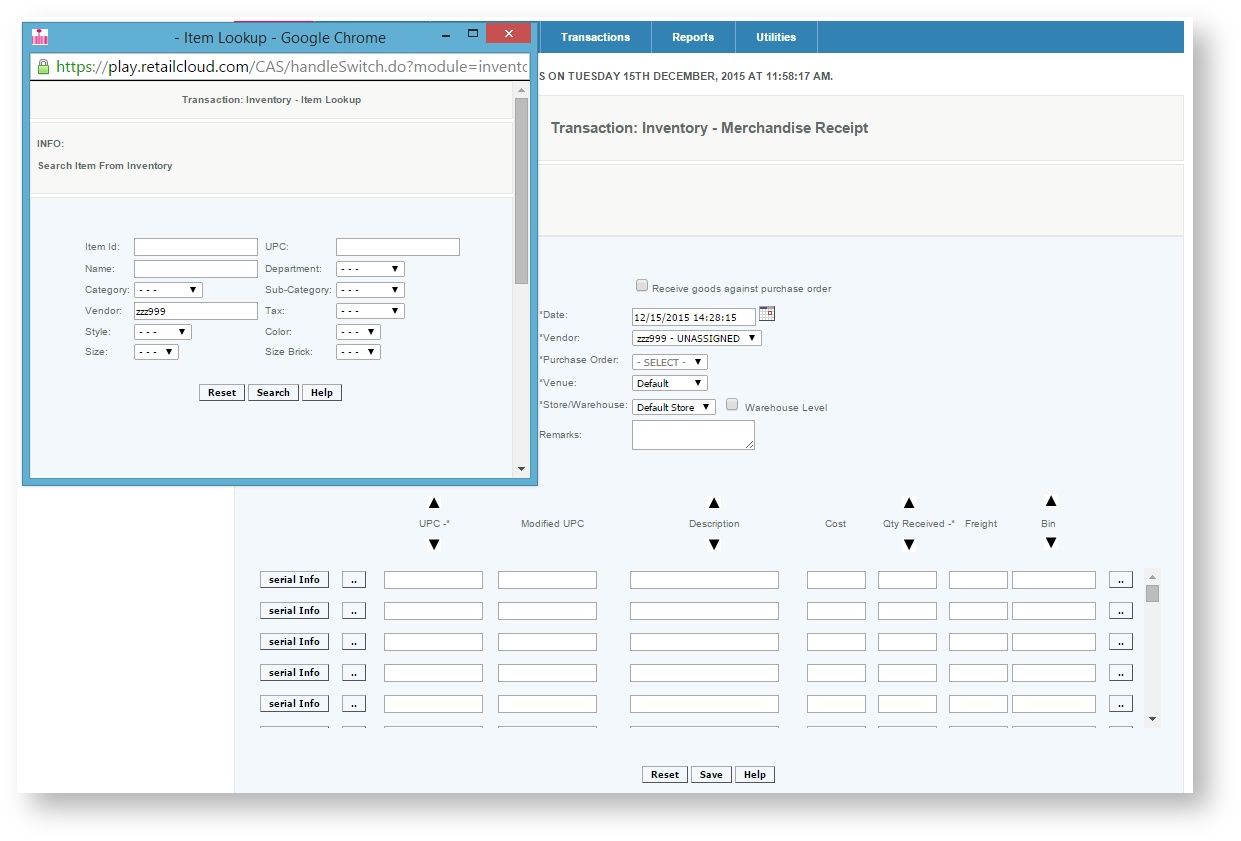
After the destination is chosen, users can either hand enter the UPC (the user can start to enter the UPC and it will display the items) or use the look-up item feature (press the box with the 2 dots in it) to place items into the receiving. When using the look-up users can select an entire block of items from the same vendor or individual ones. All items selected will be placed into the fields so quantity can be associated with the items.
Once complete, the user clicks save and a merchandise receipt will open in an Adobe document, with the location, and inventory received. This can be saved for records and can be recalled from the Merchandise Receiving Journal.
To Receive goods against a Purchase Order : If a purchase order has been created, you can pull up the purchase order and receive the inventory directly from the purchase order data
Defining the Fields to completing the Receiving:
Item UPC, modified UPC (if applicable) and description, cost, quantity, and freight of the items received, and the bin location of where to receive the items can all be accessed and entered. All fields that are followed by an * are a mandatory field.
Cost: When entering a new cost into this field, the system weights the cost with the cost associated with previously received merchandise and will update the master item table. I.e you received 5 items with a cost of $1. Then you receive 10 more at a cost of $2. The system adds cost of both shipments ($5 + $20) and then divides it by the total number of items 15 so $25/15=$1.67. The system would use $1.67 as the cost of that item into the master item.
If you try to process the same UPC twice in the same receiving transaction, the transaction will fail and an error message will be displayed. You will need to consolidate the duplicate UPC's into one entry and try again. This will also apply when a UPC is present is in two packages in the same receiving or when a UPC is received as a package and individually in the same transaction.
Items with serial numbers: Once you enter the item and quantity to be received, press the Serial Number box to be taken to a pop up screen to enter the serial numbers
Creating a bin: Bin are used to assign a space in a warehouse or store in which this item will be found.
Negative quantities for items can also be used. The primary use would be for returning merchandise to the vendor. Negative quantities are displayed on the receipt in red. Merchants that need a receipt of items that came into inventory and need to be sent back; or that are back ordered and need a record of can be received in negative QTY.
For Reference - The limitations for a valid UPC are as follows:
- a real UPC needs to be given (Trying to create a random 12 digit string of numbers probably will not meet the standards)
- Character length is 12
- UPC which are led by zero are not accepted (Example of a bad UPC - 000987867565)
- Alpha numeric UPC is not accepted (Example of a bad UPC- XX99888989, 7783SS2989)
- Hyphenated UPC is not accepted (Example of a bad UPC - XX-DD-23232222)
Bug Reporting
The Merchandise Receiving screen has the Report a Bug button. This button is for the user to report an error they have received. The user must recreate the error so it can be captured, and then the relevant logs are emailed to the support staff. The process is for the user to press the Report a Bug button. You know the report a bug is activated when a pop up message appears stating that Report a Bug is activated. This will create enhanced logs and the user would then replicate the error. When the error occurs, the logs are sent to the support staff for review.
Access
Access to this function at an enterprise level is limited by default to the System Administrator and Financial users only. Accounting, store managers, warehouse general managers as well as zone managers may receive merchandise at Venues or Store assigned to them.


