mInventory
- Kristy Sherman
mInventory works on any Android device and allows the retailer to start adding and organizing inventory with the ease and convenience of using their own phone. Just scan the bar code and you are on your way.
The MInventory application makes collecting initial inventory a breeze. Scan the product UPC and save the details retrieved from the Master Database to the Merchant’s Database. The device will show you what competitors are selling the products for which can be useful in staying ahead of the competition.
The Inventory Analysis reports provide insight into how effective your inventory is set up in terms of classifications. The better you have them set up, the better equipped you are to determine the right mix of product to satisfy your customers and bring in new ones.
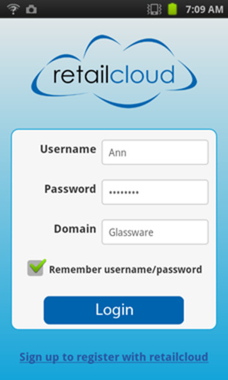
Login
Enter the username and password that you use to access your tablet, POS and management portal (CAS). If you do not have a domain established, go to “Sign up to register with retailcloud” to establish an account.
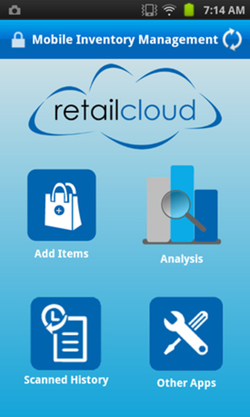
Home Screen
From the Home screen, select which function to access or perform (add items, view the analysis reports, view the scanning history, or access other retailcloud applications available on the Google Paystore). The function of each icon is described below:
Add Items: From this screen, you can scan the barcode /UPC of the product and get the information from the on line UPC database. If the item is not on the online database you can add it to the system. Once saved, these items are in the merchant database and can be accessed from the CAS or other registers at the store.
- Adding Inventory Quantity: As part of the Add Items, you can enter the quantity on hand. To actually have this quantity reflected on the system you must receive this inventory.
Analysis: This provides an analysis of the inventory to suggest considering merging classifications (departments, categories, and sub categories) to form optimal groups to better manage the data.
Scanned History: This shows a list of items scanned by the devices. This is device specific and sorted by date entered. You are also able to send a file of the added items that can be used as the imported receiving file.
- From scanned history, you can sent a spreadsheet of the items you scanned/added with the quantities. The spreadsheet is ready to be imported into CAS. This is a Receiving import spreadsheet.
Known Issue: The quantity is formatted as 1.0, and must be changed to a whole number format before importing
Other Apps: This allows for direct access to the retailcloud applications available in the Google Playstore.
Refresh/Data Sync: The Data Sync will add/update product items, classifications (departments, categories, sub-categories) and attributes (color, vendor, season, and brand) which were added or modified with the local database.
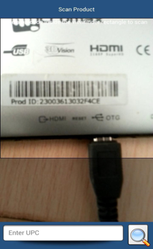
Add Item Screen
The add items button allows the user to scan the product UPC. If the item is not in the database, the user can manually enter the UPC in the “Enter UPC” box provided and click search icon.
When the UPC is entered an on line search is performed for a valid UPC. If the search is successful then the details of the Product UPC is displayed. If the UPC Is not present in the on line search a message will be displayed that the UPC is not valid and you have the option of adding the product information.
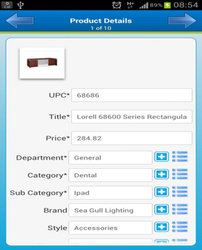
Product Details:
The Product Details Screen shows the details of the product, including an image of the product (if available), product title (description), price, department, category, sub category, brand, style, season, size, color, vendor and tax code.
Add Attribute/Classification: This icon will add the corresponding field item into the database if it does not already exist. To add “Department1” into the merchant database, the user can enter the value in the field and press the “Add Attribute/Classification” icon. If successful, the user receives the message “Department1 successfully created” or in the case of failure “Department1 already exist in database”.
List Item: The user selects the attribute or classification already created from the dropdown selection.
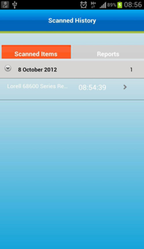
Scanned History:
This screen shows the list of items scanned and saved successfully. The saved items are categorized based on the date scanned. This is an expandable list which can expand/collapse to display full details. Emailing the scanned history, will send the user an excel spreadsheet with the scanned items, including the quantity received. This is in the correct format for completing a Merchandise Receiving Import.
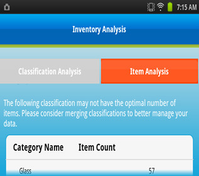
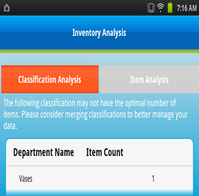
Inventory Analysis:
The Inventory Analysis screen provides the option of accessing the Classification Analysis screen or the Item Analysis screen.
This tool helps the merchant determine if the classifications are optimal. Having well structured classifications allow for reports and features to produce results that can be used to make changes to better the operation; ranging from department specific promotions and customer group specials or discontinuing slow moving items.
From the Classification Analysis screen, the user sees the departments, categories, and sub categories that may need to be merged in order to maintain the optimal classification of each classification.
The Item Analysis screen approached the analysis based on items within the classifications.
Technical Specification:
- Android version Required : Android 2.2 and above
- User Permission Required
- HARDWARE CONTROLS - TAKE PICTURES AND VIDEOS
Allows the app to take pictures and videos with the camera. This allows the app at any time to collect the images the camera is seeing.
- NETWORK COMMUNICATION - FULL INTERNET ACCESS Allows the app to create network sockets.
- STORAGE - MODIFY/DELETE USB STORAGE CONTENTS MODIFY/DELETE SD CARD CONTENTS
Allows the app to write to the USB storage. Allows the app to write to the SD card. Known Issue: For OS Gingerbread, when scanning multiple items, the first items name (Title), price, and brand is retained on subsequent scans. This device is for adding new items into the database, even if the quantity on hand is entered, it does not populate the information in the inventory balances. The inventory must be received for the quantities to be added (this can be done on CAS or using the Inventory Manager mobile application)