Creating Vendors
Overview
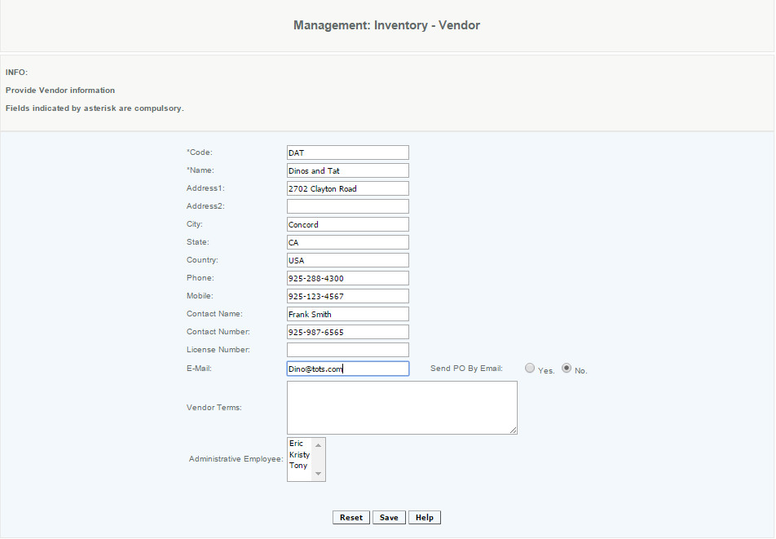
The vendor record contains information about the vendor including contact details and payment terms. The user can add an email address to the record so purchase orders can be sent directly to the vendor. The vendor is a mandatory field when all items are created.
Vendor Code - Unique code to identify the vendor. This cannot be modified once created. The vendor code is used to identify the vendor when an item is created using the item import.
Each vendor must have its own unique Name. This will show up in all reports and filters so you should name them carefully. If you try to create a vendor with an existing name an error message will be generated. As with all names, do not use special characters or issues with this vendor may occur in the future, caused by the inclusion of special characters. Vendor code and Vendor name or protected fields and cannot be modified once created.
Enter the mailing information in the Address fields, this will be the address that appears on the Purchase Orders.
Enter the Email address for the vendor. This will be the email address that the Purchase Orders will be sent to if that option is enabled.
If the Send PO by email status is set to Yes and the mail server is activated, the Purchase Order will be sent to the email address on file for the vendor.
Enter the payment terms associated with this vendor in the Vendor Term section, this will print in the Purchase Order under terms.
A vendor cannot be deleted or made inactive but can be modified as needed (although Vendor Code and Vendor Name cannot be changed). A vendor can be merged. More information
Access
Access to this function at an enterprise level is limited by default to the System Administrator and Financial users only. Accounting, store managers, warehouse general managers as well as zone managers and human resource managers may modify vendor settings at Venues or Store assigned to them.

